Thursday, July 15, 2010

[Mid-Term] "Earth Bank" by Matt Brooke and Walter Cicack

Earth Bank

a Living Building System engineered by Matt Brooke and Walter Cicack

Earth Bank is a concept for a new kind of cast in place wall that is rigid like a concrete panel but contains and supports living plants which grow and envelop it. This concept is currently envisioned as a partition wall or wall sheathing system and is not currently being engineered for structural applications.

The primary engineering task in creating the Earth Bank is to experiment with a variety of different cementitious mixtures in order to find one or more that fit the following criteria:

1. The Earth Bank must be rigid enough to support its own weight and coherent enough not to fall apart. It is intended to degrade and erode over time, but over the course of years, not weeks or months.

2. The Earth Bank must provide a viable living substrate for grasses, flowers, and annual/perennial herbaceous plants. The Earth Bank should provide these plants all of the air and fertilizer they need to grow and reproduce, with the intention being that the Earth Bank is self-seeding and does not need to be replanted after installation. Water for these plants will be provided by either rainwater or an irrigation system depending on the particulars of a given installation.


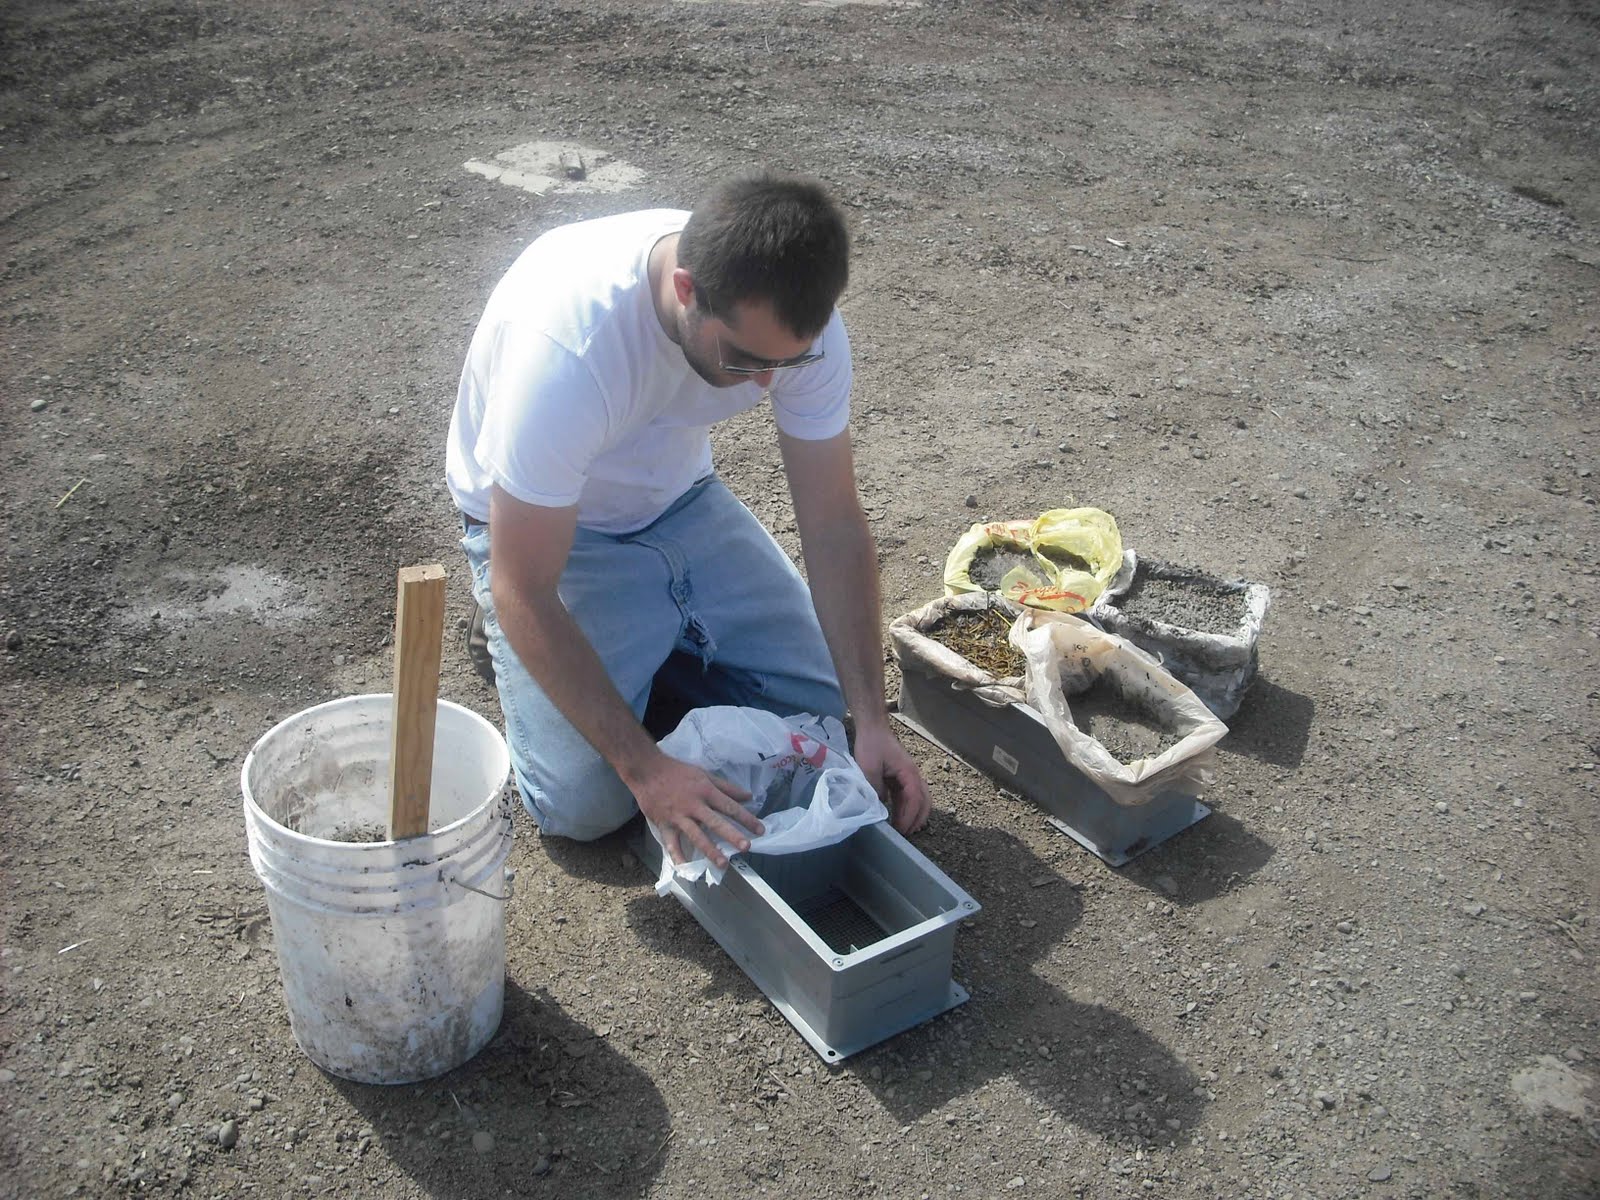
In order to test the different mixtures for the Earth Bank, we decided to pour several small test blocks in improvised brick molds (recycled vent housings from Bring Recycling Center). With eight brick molds, we are able to test eight different mixtures a week. We plan to do three sets of eight blocks a piece and after each round to further clarify and refine the mixture.


In order to give ourselves the best possible chance of finding a viable mixture for the Earth Bank, we have acquired a broad palate of possible materials. They list as following:


Mortars:

lime – acquired from Jerry's hardware


Portland cement – acquired from Jerry's hardware


Aggregates:


perlite – acquired from Aqua-Serene hydroponic supply


red cinder lava rock – acquired from Lane Forrest Products


sand – acquired from Lane Forrest Products


Organic Substrates:


organic soil – acquired from Lane Forest Products


organic compost – acquired from Lane Forrest Products


Organic Fibers/Binders:


straw – acquired from Lane Feed Supply


coconut fiber – acquired from Aqua-Serene hydroponic supply


peat – acquired from our professor, Rich Hindel


Seeds:


different varieties of turf grass indigenous to the Willammette Valley – acquired from Irwin and Son's seed supply


wildflowers native to the Willammette Valley – acquired from Irwin and Son's seed supply


various wild sedum, vines and weeds – acquired from various wild locations in Eugene, Or


Hypertufa:

Hypertufa is an artificial stone product made by adding various low-density aggregates to portland cement. It is similar to the Earth Bank concept in that it is a light weight version of concrete which can be poured and shaped like traditional concrete. Hypertufa has not been conceived as a living plant medium; it serves us as a precedent because it successfully lowers the weight and density of a concrete mixture by using peat and perlite as aggregates, a concept which we have incorporated into our various Earth Bank test mixes.


Construction Schedule:

The first round of test bricks were poured on Monday July 5th, and the second round was poured a week later on Monday July 12th. We are hoping to get another round of the test bricks poured by Thursday July 15th and another poured early on the week of the 19th. Ideally, we would like to get at least four or five rounds of eight test bricks a piece poured before we pour the final product in early August. Each round of test bricks gives us valuable data to inform successive trials; we hope to get as much data as possible to inform the engineering of our final product.

[Mid-Term] "Midori Yane" A Japanese-inspired tiled green roof by Amanda Loomis, Crystal Morrison and Jennifer Purcell

Project description:
As an experiment in the combination of landscape, architecture, and product design this green roof addresses the need for a modular integral roofing and planting unit. This horticultural building system was inspired by Japanese style ceramic tile roofing systems.


Inspiration:

Japanese roofs: the artistic waves of interlocking tiles opened the design opportunities to modification for planting materials.
By taking an artistic approach to the project, our focus is to create a beautiful and functional roof that is also sustainable.

Research:

The origin of clay roofing tile can be traced independently to two different parts of the world: China, during the Neolithic Age, beginning around 10,000 B.C.; and the Middle East, a short time later. From these regions, the use of clay tile spread throughout Asia and Europe. Not only the ancient Egyptians and Babylonians, but also the Greeks and Romans roofed their buildings with clay tiles, and adaptations of their practice continue in Europe to the present. European settlers brought this roofing tradition to America where it was established in many places by the 17th century.

Ceramic tile roofs can have a life of 100 years and have been used and reused for centuries. Research shows that tile roofs retain heat in cooler temperatures as well as staying cool in extreme heat better than traditional asphalt tiles widely used in the U.S.

Clay roof tiles have fireproof qualities, are durable and require little maintenance. Due to these benefits, ceramic tile roofs which are an ancient sustainable product are making a comeback in the U.S.

The first tile-making machine was patented in the 1870’s. There are large production factories all over the United States. Some of the first were located in Akron, Ohio and Baltimore, Maryland.

In the 18th Century, S shaped, also called pan tiles, were widely used in the United States. The tiles are hung on roofing laths by a ridge. They are connected by peg holes, nails, screws and often, mortar at the ridgelines. We experimented with various forms for the tile such as Italian, Spanish and Japanese style tile. We sketched various forms as shown in these images:


We were most interested in Japanese style roof tiles. Semicircle ridge tiles that are often decorative, cap the end of the clay roof. Decorative end cap- Antique Japanese ceramic roof tile decorated with swirling comma pattern.

Roof tiles are called kawara in Japan, where they are used not only to protect a home from the elements but are also as important architectural ornaments. Roof eaves are sometimes decorated with special pendant tiles called nokimarugawara which feature a circular disk attached to a half-round tile. The disk (gatou) will often feature an image such as a household seal (kamon) or an image thought to act as a protective charm.
Decorative roof tiles often feature images associated with water, as such images were once thought to provide protection against the dangers of fire. An especially important water symbol was the swirling tomoe pattern. The basic tomoe design originated in China and has been used in Japan since at least the Yayoi period (300 B.C.-300 A.D.). The pattern always includes one or more comma-shaped swirls oriented in a right or left facing pattern. This image is thought to symbolize water as the Chinese character used to write this name translates as either “whirlpool” or “eddy”. The tomoe design has spiritual connotations as well and is a frequently seen on religious implements and used with temple and shrine architecture.

The field tiles will have a cupped structure inspired by the ginkgo leaf. The cup will hold a growing medium to support plant growth. The approximate depth of soil medium will be 3 1/2”. We were inspired by the form of the fan shaped gingko leaf and plan to imprint the pattern of the leaf on the fan shaped cup.

Production:
A pneumatic clay tile extruder will be used to create the roofing pieces. There will be 4 distinct tiles to comprise the roof. Left gable, right gable, field tile and eave tiles. Each tile will need two dies creating two separate pieces which will then be put together then fired as one roofing tile.

An extra step will need to be done to the field tiles and the eave tiles. The field tiles will need an additional piece added to hold the growing medium and plants. The eave tile pieces will be the combination of the field tile with a front cap piece added as well as a final circular artistic tile.

Installation:
An additional roof space will be constructed off of the side of the storage container at the Courthouse Garden. This roof will be built using 2x6's, plywood, lag screws and nailing plates. The slope of the roof will be 4/12, making it a relatively low-slope roof. The roof construction can be seen in the following drawings:

Traditional ceramic tile roof installation processes will be used to install the roof. 30# felt roofing material will be installed over the plywood roof. Tiles will be fit together and be fastened to the roof using screws.


Soil medium will be a 80/20 mix of perlite and loam. The ginkgo shaped soil pockets will be lined with nonwoven fiber, then filled with the soil medium. The following plants will be used:

Our construction schedule is front-loaded with tile fabrication due to kiln availability. The kiln will be available to us until the last two weeks of class. So in order to have time to create test tiles and produce the number of tiles needed, we will first create the tiles and then construct the roof. We have been fairly conservative in estimating our time for fabrication, which has given us some room to shift deadlines as needed. A tentative project timeline is as follows:


Materials:
Our materials are very easy to come by and have been sourced locally. Our materials include:
-2x6 lumber from reclaimed cedar decking on site
-30# roofing felt from BRING! Or Jerry's
-Plywood onsite
-Fasteners (nailing plates, tile screws, lag screws) from Jerry's ($10)
-2'x2' Aluminum plate for extruder templates from Coyote Steel ($29)
-Ceramic clay from Ceramics department (approx. $40)
-Perlite
-Soil
-Plants from local cuttings and purchased from Grey's as needed
-nonwoven fiber

[Midterm] Urban Farm Stormwater Installation Project, Vanessa Nevers + Eva Peterson

LINKS TO URBAN FARM PROJECT POSTS:

INITIAL DESIGN CONCEPT DRAWINGS

DESIGN STATEMENT


STORMWATER LADDER CONCEPT REVISION:


Stormwater Ladder On Site


Stormwater Ladder Detail


PRECEDENT IMAGES:


1. A downspout installation by Buster Simpson

Source: http://seattletimes.nwsource.com/html/thearts/2004016910_visart16.html


2. Rainwater management system by Buster Simpson

Source: http://www.happyhotelier.com/2008/11/20/pimp-my-drainpipe/


3. Installation at Turtle Bay Exploration Park by Buster Simpson

Source: http://picasaweb.google.com/lh/photo/3LW9NuFqJvKdd2lbUzOkxQ


4. DIY gutter planters

Source:http://gardenhacker.com/?p=109


5. Engaging the senses…what can water looks like, sound like?

Sources, Fish fountain: http://mocoloco.com/art/archives/001614.php, Chimes: http://www.wind-chime.biz/cp


HABITAT TEMPLATE

Vernal Pools


Vernal pools are temporary pools of water. Most pools are dry for at least part of the year and fill with the winter rains or snowmelt. This habitat relates to the infiltration pits featured in our stormwater management system. Like a vernal pool, the level of moisture present will vary dramatically throughout the year, however standing water will not occur.

Flora: Vernal pools are home to many endemic species because of the unique environmental niches created. Different species are suited to different moisture levels, and as water evaporates from the edges of a pool, rings of flowers blossom around it. The color patterns change as the wet season wears on. The rings may form swirls and layers, with the green of new grass surrounding the whole pattern.

Flora commonly found at vernal pools include Downingia and lupine species, yellow pansies, several sweet-scented clovers, a variety of goldfields, button parsleys, yellow and bright lavender monkey-flowers, star lilies, yarrow, and endangered grasses such as Solano grass. A large number of rare, endangered species, and endemic species occur in vernal pool areas.

Text Source: Wikipedia

Image Sources:

vernal pool 1, http://en.wikipedia.org/wiki/File:Vernal_Pools_2.jpg

vernal pool stages, http://jeremybiggs.files.wordpress.com/2008/10/vernalpool.jpg

Vernal pool flora best suited to the project’s environment:


Large leave lupine (lupinus polyphyllus).

Ecology: moist to wet open habitats, stream side, wet meadows, disturbed sites

Other Notes: Fix nitrogen and fertilize poor soils


Small-flowered lupine (lupine polycarpus).

Ecology: open, gravelly and sandy sites at low elevations


White clover (trifolium repens).

Ecology: disturbed sites (field, roadsides), low to sub-alpine elevations


Springbank clover (trifolium wormskjoldii).

Ecology: moist to wet, open places


Chickweed monkey-flower (minmulus alsinoides),

Ecology: vernally moist, often shady, mossy ledges, cliffs, rocky slopes, found mostly at low elevations

Other Notes: annual herb


Yellow monkey-flower (mimulus guttatus).

Ecology: wet ledges, crevasses, weeping rock faces, seepage areas, along streams, near springs, gravel bars, wet ditches and clearings, common from lowland to high elevation

Other notes: annual (fibrous roots) or perennial (from creeping stolons)


Pink monkey-flower (mimulus lewisii).

Ecology: common in and along streams, especially cold ones, wet clearings, forest in avalanche tracks, mid to high elevations

Other Notes: perennial


White fawn lilies (erythronium oregonum).

Ecology: well-drained ,open often grassy areas, open to fairly dense, rocky woodlands, low elevation

Other notes: perennial herb


Yarrow (achillea millefolium).

Ecology: on dry to moist, well drained, open sites, meadows, rocky slopes, gravel bars, roadsides, open forest, low to high elevations, often weedy at lower elevations, common and widespread

Other notes: possibly too invasive for this application

Plant information sourced from: Mackinnon, Andy and Jim Pojar. Revised Plants of the Pacific Northwest Coasts. Lone Pine Publishing, c. 2004.

Readers- Please let us know if you have additional information of interest regarding the plants above (invasive species, non-hearty plants, etc.).


Other plants of interest:


Musk-flower (mimulus moschatus).

Ecology: stream banks, moist meadows, rocky seepage area, thickets, road sides, other moist shaded areas, low to mid elevations

Other notes: perennial


Fern (cystopteris fragilis).

Ecology: cool, moist to dry, often calcium rich, rocky forest and openings, rock cliffs/crevasses/ledges, talus slopes


Maidenhair Fern (adiantum pedatum).

Ecology: shady, hummus-rich sites, and moist often rocky forests, on steam banks, cliffs, and in the spray zone of waterfalls

Above plant information sourced from: Mackinnon, Andy and Jim Pojar. Revised Plants of the Pacific Northwest Coasts. Lone Pine Publishing, c. 2004.


Comfrey (also comphrey) is an important herb in organic gardening, having many fertilizer and purported medicinal uses. Comfrey is a particularly valuable source of fertility to the organic gardener. It is very deep rooted and acts as a dynamic accumulator, mining a host of nutrients from the soil. This plant is present on the proposed installation site, and may be incorporated into the design.


Source: Wikipedia


FLOW VOLUME CALCULATIONS
Average Stormwater Volume Conditions for Eugene, OR

Monthly inches and hours given are averages over a 50 year period.

January: 7.9in / 143hrs = .055in/hr

February: 5.5in /112hrs = .049in/hr

March: 5.3in /118hrs = .045in/hr

April: 3.1in /73hrs = .042in/hr

May : 2.3in / 54hrs = .043in/hr

June: 1.4in /32hrs = .044in/hr

July: .5in / 9hrs = .055in/hr

August: .9in /16hrs = .056in/hr

September: 1.4in / 25hrs = .056in/hr

October: 3.6in /65hrs = .055in/hr

November: 7.5in /126hrs = .057in/hr

December: 8.3in /140hrs = .059in/hr

Site A: Peak stormwater volumes accumulated in 1hr from the Urban Garden ceramics shed roof.

Roof area = 150 sq ft

Average Peak Volume (December) = .059in/hr = .036gal/hr

Max Recorded Volume = 1.14 in/hr = .71gal/hr

Surface Area of Roof X volume of stormwater gives:

AVERAGE 5.52gal/hr = .09gal/min

MAX RECORDED 106.59gal/hr = 1.78gal/min

Site B: Peak stormwater volumes accumulated in 1hr from the Urban Garden potting shed roof.

Roof area = 288 sq ft

Average Peak Volume (December) = .059in/hr = .036gal/hr

Max Recorded Volume = 1.14 in/hr = .71gal/hr

Surface Area of Roof X volume of stormwater gives:

AVERAGE 10.59gal/hr = .18gal/min

MAX RECORDED 204.48gal/hr = 3.41gal/min


PROJECT SCHEDULE

7.13.10 Tuesday

Clean up fascia board

Pick up sample materials

Construction process photos

7.14.10 Wednesday

Create title

Take construction process photos

Complete design drawings

Complete construction drawings

Condense habitat template

Flow calculations

Test fasteners

Upload Midterm Blog Posts:

Presidents, DDs, CDs, renderings, habitat template, process photos

7.15.10 Thursday

Midterm Due

Site clean up

Grade site

Infiltration test (x2)

Remove existing fascia board

Replace fascia board

Weekend

Revise construction drawings

7.19.10 Monday

Purchase materials

BRING, Jerry's, Eugene Sand and Gravel, Lane Forest Products

Begin constructing Fence drainage systems

7.20.10 Tuesday - 7.22.10 Thursday

Fence drainage project

Construct Fence drainage system and infiltration pit

7.26.10 Monday - 7.29.10 Thursday

Potting Shed project

Construct Potting Shed drainage system and infiltration pit

8.1.10 Sunday

All construction complete

8.2.10 Monday

Purchase all plants needed

Plant infiltration garden and drainage systems

8.3.10 Tuesday

Finishing touches

Document (photograph) projects on-site

8.4.10 Wednesday - 8.5.10 Thursday

Off

8.9.10 Monday - 8.10.10 Tuesday

Compile Final Drawings and Documents

Photographs, final drawings and renderings, final written statement

Upload Final Blog Posts

8.11.10 Wednesday

Final Project Due


CONSTRUCTION PROCESS PHOTOS


Reclaimed boards before and after paint removal and sanding


The project team ready for action


Vanessa sanding the reclaimed boards

MATERIAL SOURCING


Recycled materials will be sourced from BRING


Downspout and gutter prefab sections will be sourced from Jerry's


We then used the prefabricated downspout pieces to experiment with the form and orientation of the system.


DESIGN + CONSTRUCTION DOCUMENTS


Stormwater Ladder at Ceramics Shed


materials: perforated metal downspout and prefab metal elbow


Planted Filtration Unit at Fence
materials: perforated gutter section, substrate,selected plants


Gutter Waterfall Step (Optional) at Fence
materials: gutter section, debris screen


Cross Section of Waterfall Step at Fence
materials: metal strapping connection system, metal screen

Drainage System at Potting Shed


Cross Section and Elevation of Potting Shed Drainage System
materials: prefab gutter, gutter screen prefab downspout elbow sections, substrate, selected plants


Connection detail at planter


Stormwater drainage system and infiltration bed in context

Additional notes: materials will be sourced from BRING, Jerry's, & Eugene Sand and Gravel